Pages

Showing posts with label Bread. Show all posts

Monday, December 31, 2018

Cheese Puffs

Nothing but love for these little delights. Perfect for a dinner party or indulge yourself in their scrumptious flavor just for you. The choux pastry can be made ahead and frozen until ready to use. The make ahead quality makes this recipe work for me. I can throw together the pastry, enjoy a few puffs with dinner and freeze the rest for another meal. I think you'll love them.

Here's what you'll need.

1/2 cup all purpose flour (sifted)
1/2 tsp. salt
1/2 tsp. sugar
1/4 cup water
1/4 cup milk
2 eggs beaten
1/2 cup hard cheese of choice (I used Parmesan)
Beaten egg for glaze
Seeds of your choice ( I used poppy seeds. Sesame is a good choice as well)

* If you are planning to freeze these, do not brush with egg prior to freezing. Instead, take them straight from the freezer, brush with egg, top with seeds and bake them right away.

Preheat oven to 375 degrees.
Place the butter in a heavy bottom saucepan on medium heat. As the butter begins melting add the milk, water, sugar and salt. Bring to a boil. Add all of the flour at one time. Stirring constantly. Cook over low heat for about 1 to 2 minutes or until the dough forms a ball and leaves the sides of the pan.
Congrats! You just started some choux pastry dough.
Place the dough into a bowl and using a mixer, beat until cooled to lukewarm. Add the beaten eggs. Mix well. The dough will look sloppy but it'll come together. Add the cheese. Or also throw in some of your favorite herbs at this point. A tablespoon of chives would do nicely.
On a parchment lined baking sheet, make 8 gorgeous mounds of dough. Brush with the beaten egg and sprinkle with seeds. The seeds give a nice crunch.
Bake for 10 minutes, lower the oven temperature to 350 degrees and bake for an additional 25 -30 minutes.

Bake just two for you or double the recipe and bake sixteen for a crowd. It's up to you!

Happy New Year! 

Wednesday, January 14, 2015

Oatmeal Bread


Recipes with a reason. Amy Vanderbilt's Complete Cookbook was illustrated by Andy Warhol. One can only image how this cookbook came together. In 1961 the etiquette queen of New York and Andrew Warhol worked together to create a complete vision of cooking. I have a first edition of this book but, sadly it's been used and very abused. Who had the most tantrums while this book was in production? I'm sure both author and illustrator threw around a few choice words from time to time.

Anyhow, poor Amy met a fate that is one of debate. Did she jump onto the sidewalk in front of her New York townhouse on 87th Street or did she have a lightheaded moment that caused a fall from her 2nd story window? Her fate was dismal either way. Dismal would be the reasoning behind my selecting this recipe today.
In her recollections Ms. Vanderbilt associates this recipe with her experiences of World War I. Mind you she was a mere child during that time period but, the rationing of wheat inspired the baking of this Oatmeal Bread. In her book she refers to this loaf as a "delicious wartime sacrifice loaf."
Just as I imagine what Amy and Andy must have been doing during the late 50's and early 60's as the cookbook is being created. I also imagine what life must have been like for Ms. Vanderbilt during the days of 1914. I can't imagine that she suffered too horribly during the war as she was from a somewhat affluent family. Unlike another female of this time period Marina Yurlova.
Marina Yurlova would likely have never had the luxury of smelling this delicious bread baking during World War I. For certain there were no molasses around as she crawled on her belly through the barbed wire. She must have laid awake dreaming of the warmth of a bed and water in which to bathe. She would be the true spirit of womanhood during this time period in which Ms Vanderbilt makes mention of wartime rations.

Although Andy Warhol was of Slovakian descent, I doubt he knew much of hunger or being exposed to freezing conditions as Marina Yurlova had known for many years. Mr. Warhol knew his own suffering when he was the victim of an attempted murder in 1968. Shot and severely wounded. He survived by the skin of his teeth. Warhol was also known to be a bit of hypochondriac and spent some of his childhood suffering from nervous system disorders.
What an awful bunch of dismal gloom. Should I frame these illustrations and call them Warhol art?
That man can draw meat! And various other food stuffs.

I didn't use the raisins called for in the above recipe. Mostly because I'm over dried fruit. I used chopped pecans instead. My Miss Aimee made that wrinkled nose face and said, "Is there raisins in here?" Oddly enough the mouth tastes raisins even though my loaf contained none. It is outstanding in flavor. I will bake this loaf again. Aimee and Mister loved the bread.
Marina Yurlova was the same age as my daughter when she fought for the Cossacks during World War I as a soldier. She won the St. George Cross for bravery 3 times. How my imagination toils around the suffering of this young militant woman. She narrowly escaped having her leg amputated after a severe injury. She was imprisoned and had a mental breakdown yet, still persevered to become an author of the book Cossack Girl.
I wonder if the three Andy Warhol, Amy Vanderbilt, and Marina Yurlova ever crossed paths in life in any way shape or form.
If you are venturing about in the ice and cold of January, it's all too easy to complain of the dismal days. Open up your pantry door, most likely you have food. And Heat. Most of us have the above ingredient list in our pantries with exception of the molasses. You might have to put on your boots and slosh out and grab a bottle of Brer Rabbit. It will be worth the inconvenience. Warm up your world and beat the dismal blues of January with this simple rustic bread.
I'm thankful my daughter has never known firsthand the horror of war.
It's a little history lesson in our home. Teaching can extend out of the classroom into the kitchen with a little bit of imagination. Tonight we enjoyed this recipe for Oatmeal Bread and the story behind the triumphant survival of a young woman of history.


Saturday, January 25, 2014

Soft Pretzels

From Nebraska came a box of holiday cheer. Sent to our family from Goody over at Eat The Blog. The box contained many cool treasures, among them was a neat book called, "Cooking Up U.S. History"
This recipe for soft pretzels comes from that book. A section of the book is called The Mid-Atlantic States. Pennsylvania is being classified as part of the mid-atlantic states. Mister and I just traveled the PA to visit the Flight 93 Memorial so this recipe chimes right along with the theme of this part of the world tonight.
I have made the pretzels twice. The first time we actually formed the dough and twisted the dough into the classic pretzel shape. What a hassle. The pretzels were difficult to manage in the baking soda water and although the flavor and texture was fantastic, the shape was pathetic. This time, we opted for the pretzel nuggets. Shapes are important with respect to many things. Not soft pretzels. Make 'em long, or circular.
I melted a little processed cheese food like product with some skim milk and made a delightful cheesy dipping sauce. Geez, maybe I should hunt around for some gouda or something but, the block of orange cheese has been floating around since Christmas. In the words of the great Emily Litella.... "Nevermind." The pretzels are outstanding.


Homemade Soft Pretzels

1 package of dry yeast
1 and 1/2 teaspoons of white sugar
1 cup of very warm water divided
2 and 1/2 cups of all-purpose flour
1 teaspoon table salt
2 tablespoons or more of coarse salt
cornmeal for dusting the pan
baking soda for dipping the pretzels

  1. In a small bowl dissolve the yeast with the sugar and 1/4 cup of the warm water.
  2. In a large bowl, mix the flour and salt, Then stir in the remaining 3/4 cup of the warm water.
  3. The yeast mixture should be foamy by this time and ready to add to the flour mixture and stir thoroughly.
  4. Put the mixture on a floured surface and let it rest for 5 minutes.
  5. Wash and dry the large bowl and grease it well.
  6. Knead the dough for 10 to 15 minutes, adding more flour as you go if the dough is sticky. Most likely you will need to keep sprinkling the dough with small splashes of flour. Kneading dough is fun.
  7. Put the dough back into the well greased bowl and cover with plastic wrap.
  8. Let the dough rise for 1 hour or until doubled in size.
  9. Punch down the dough.
  10. Cut the dough into 8 pieces.
  11. Roll each piece into a 16 inch long rope.
  12. Cut the rope into approximately 16 pieces. Bear in mind the longer the rope the more pieces, the smaller the pretzel bites.
  13. Let the pretzels rest on a floured surface under a towel for 15 minutes.
  14. Preheat your oven to 450 degrees.
  15. Simmer one quart of water with 2 tablespoons of baking soda in a manageable size cook pot.
  16. Line your bake sheet with parchment paper and sprinkle with cornmeal.
  17. A FEW pretzels at a time tip them in the simmering baking soda water for 20 seconds on each side. Fair warning, work quickly with this because the pretzel dough will quickly become smoosh. Remove quickly with a slotted spoon.
  18. Place the pretzel nuggets on the cornmeal lined bake sheet. Sprinkle with the coarse salt.
  19. Bake 10-12 minutes or until light brown. In reality my baking time was longer. Just watch for the classic golden brown color.
  20. Serve warm with some type of fabulous dipping sauce.
On our way to the Flight 93 Memorial we came upon Auntie Anne's pretzels at one of the rest areas. Cinnamon Sugar nuggets are pretty delicious. Make this recipe your own by rolling the warm pretzels in cinnamon and sugar or another flavored coating of your choice. 

Unbaked pretzel nuggets waiting for the baking soda dip.


Monday, January 6, 2014

English Muffins


"Sumptuous Things For Thee To Eat" are words gracing the cover of my Stan Hywet Hall Cook Book. This printing does not have a copyright or date or general author information. I am guessing it was printed in the 60's-70's range due to the aged look of the book and the sorts of recipes.
The original cook book committee lists Mrs. John R. Kaltenbach as the Chairman.

It's an ungodly -6 degrees outside my kitchen window today. If one factors in the windchill to the equation, it's basically damned cold. Damned cold is cold no matter how you slice it. Perfect day for making English Muffins. I know, you can buy them in the store. Just try pronouncing everything on the ingredient list. Then consider making your own. I'm glad for making the attempt and will consider making our own forever more. Warm homemade muffins bring a little comfort to the cold day.

This English Muffin recipe is indeed a sumptuous thing to eat. I adapted it slightly because I didn't have sweet cream. I'm not sure what this cook book was referring to as sweet cream, evaporated milk maybe? I combined skim milk and heavy cream. I have noted this slight change in the recipe.

Stan Hywet English Muffins

1 cup sweet milk, scalded ( I used 3/4 cup skim milk and 1/4 cup heavy cream)
1/4 cup Crisco
2 tsp. salt
1 Tablespoon light corn syrup
1 pkg. dry yeast
3 cups sifted all-purpose flour
cornmeal for dusting
additional shortening for frying*

  1. Scald the milk.
  2. Soften yeast in a small amount of warm water. ( I used 2 tablespoons)
  3. Add Crisco, salt and corn syrup to the warm milk.
  4. Add softened yeast to the milk mixture.
  5. Add flour, and mix with a spoon until the dough is smooth and well blended.
  6. Turn onto lightly floured board and knead for a little bit then roll the dough to 1/4 inch thickness. Cut with a 3.5 inch floured round cookie cutter. Place them on a cookie sheet that has been sprinkled with cornmeal. Dust the tops of the muffins with a small amount of cornmeal. Let rise in a warm place until light, about one hour.
  7. Preheat an electric skillet to 340 degrees. I think a frying pan with a lid will work if cooked on medium. Brush the skillet lightly with shortening. *Lightly, got it...
  8. Bake covered, 10 minutes on each side.
  9. Cool, Split, toast, butter and then thee can eat it!!
It's still frigid cold but the house smells great and we have sumptuous muffins.

This made 7 muffins.


For those who are not Ohioans, Stan Hywet Hall is a magnificent mansion and gardens located in Akron, Ohio. A very nice historical place to visit.


Tuesday, November 5, 2013

Breakfast Pastry


Looking for the perfect pastry to make while you're entertaining? Looking for the perfect pastry to make and have the next day? This recipe is perfect. It's easy, impressive, and actually fun to make.
Really, it's easy. Make sure to use room temperature eggs. You can bring eggs to room temperature quickly by placing the eggs on the stove top in a bowl while the oven preheats. This method is usually good enough to take the chill out of them. If not put the eggs into a bowl of warm water.


#1 Gather your ingredients

2 sticks unsalted butter (if using butter with salt, omit the salt...and please do not use margarine!!)
1/2 tsp. salt (divided)
2 cups all purpose flour (divided)
1/4 cup water
3 large eggs at room temperature
1 teaspoon almond extract
2/3 cups of jam (divided)
1/2 cup toasted nuts or coconut (divided)
1/2 cup powdered sugar
1 teaspoon vanilla
4 teaspoons water

#2 Toast your nuts or coconut, I do this on the stove top in a dry skillet over medium heat and watch it closely, moving the coconut/nuts around in the pan to a nice toasty brown. You can bake it but, I like pan toasting mine.

#3 Preheat your oven to 350 degrees.

#4 Line your bake sheet with parchment paper (I hit the pan with a little non stick spray just to hold   the paper in place, not required)

#5 For the bottom "crust" layer you will need to cut one stick of butter into one cup of flour, and 1/4 teaspoon salt until it looks like coarse crumbs. Use your fingers, mixer, or fork to make it all crumbly. To make this job easier, you can slice the butter into tiny pieces before adding to the flour.  Add 1/4 cup of water and mix until the dough comes together

#7 Divide this layer of dough in half. The goal is to spread each half of dough on the bake sheet into a 10"x3" layer. This is best accomplished by plopping even amounts of dough in a line and then spreading each dollop towards one another. You will need WET fingers to do this. Check out this photo for a helpful image of spreading the layers. 
 #8 To form the top layer of the dough you will need to bring the 1/4 cup of water and one stick of butter to a boil in a medium saucepan. Add the 1/4 tsp. salt and remaining 1 cup of flour all at once into the boiling water and butter and stir until this comes together into a nice steamy ball. It happens quick. Remove from heat and add to your mixing bowl. Mix it up for a few seconds to cool it slightly. Add the eggs one at a time and mix well after each egg. Mix for a minute or so and mix in the almond extract.

#9 Divide this layer of dough in half and spread each crust layer with half of this dough. This spreads a little easier and can be done with a rubber spatula. If you have trouble doing that, just use wet fingers again. You want to completely seal and cover the first layer.

#10 Bake in a preheated oven for 50-60 minutes or until deep golden brown. Mine took 50 minutes. Remove from pan to a wire rack.

#11 Immediately spread the pastries with jam or jelly or your choice. I happened to have a batch of summer strawberry and peach jam on hand. Sprinkle with coconut or your choice of toasted nuts. The puff will start to sink in as you apply the jam, that's by design, it's okay!


#12 Stir up the glaze. The powdered sugar, vanilla extract, and 4 teaspoons of water. Drizzle this over the pastries.


You see it's really easy and you end up with something like this.

This same dough could be used as a savory dish. I can see topping the warm pastries with a little white gravy, scrambled eggs, and cheese to make a perfect savory breakfast pastry. Or maybe a little mascarpone cheese and fresh fruit! See, just perfect!


Thursday, September 5, 2013

Jellied Sweet Rolls


The Dough

1 1/8 cup of lukewarm water
3 cups all purpose flour
5 tablespoons unsalted softened butter
2 1/2 teaspoons instant yeast
3 tablespoons sugar
1 1/4 teaspoon salt
1/4 cup powdered milk
1/2 cup instant mashed potatoes

  • Mix everything together in one big bowl. If using a stand mixer, mix for 7 to 9 minutes. If mixing by hand, the dough should form a nice smooth ball. I used my mixer. The dough should clean the sides of the bowl with only a little bit sticking to the bottom.

  • Place the dough into a greased bowl. Cover and let rise at room temperature until almost double in size. This should take about an hour.

  • Grease two 9" round cake pans, or I used one large deep dish pizza pan. 

  • After the dough has risen, remove to a lightly greased work surface. Pat the dough gently into a 16"x12" rectangle. No rolling pin is needed. This is a soft tender dough. 

  • Slather with the fruit jelly filling of your wishes. I used my homemade "Wild Woman Jelly" that consisted of all of the leftover fruit from jelly making one day.  Use your favorite jelly. Leave a one inch space at the long side of the roll plain... with no jelly.
Mister called me a wild woman for making so much jelly in one day thus the jelly became my namesake. Blueberry, strawberry, cherry and peaches cooked together nicely to make a good mixed fruit flavor jelly.

  • Roll the dough the long way, rolling towards the edge with no jelly. Pinch the edge of the dough where it meets together. You will have a 16" long log.
  • Slice the log into 16 pieces. I found this a little tricky because the dough is so soft and soupy- like. Fear not, even if the rolls look shabby going into the pan, the second rise time will even things out a bit. Maybe next time around, I will shoot for perfect. Today, I was shooting for accomplishment.
  • Place 8 rolls in each pan or all of them into one big pan.
  • Cover, let rise again until puffy and risen together and crowding. This should take about 45 minutes.
  • Preheat oven to 350 degrees
  • Bake the rolls until golden brown around the edges and turning golden across the center 25-30 minutes.
Remove the rolls from the oven and turn them out to cool on a wire rack. Use your favorite icing as a drizzle. Icing just only the rolls to be eaten right away. Otherwise follow directions below.

Cool completely with no icing. Wrap and keep at room temperature for several days and only frost them as you need them. I think a quick pop in the microwave would be great.

My Drizzled Icing

1 1/2 cups powdered sugar
1 1/2 tsp. white vanilla
4-7 tablespoons of fresh squeezed lemon juice

Use milk, or water or orange juice. Just about any liquid will work. I just liked the tangy lemon flavor against the sweet jelly.

The garage construction crew will have a treat waiting for them in the morning.


Thursday, January 24, 2013

Cheese Stuffed Breadsticks

Yeast based recipes and I are not friends. I love them. But, fickle as a teenager, I tremble in the mere presence of that lump of dough. I love it, then I'm afraid of it. I've told you this before. Still, I jumped back on the bread baking band wagon once again. Every great bread baker tells me, with experience I too can turn out a great loaf of bread.

Hey, I think try and fail... try and fail might be the key. Today, I baked. It didn't fail.


Kudos to you ladies who whip up a batch of dinner rolls and have them ready for your family, at dinner time actually serving them with dinner. I told Mister, "I want to learn how to crank out a batch of dinner rolls as effortlessly as I whip up cornbread and biscuits."

This recipe might just do that for me.

Yes, we are eating on the fly, out of the pan. Tonight we bellied up to the bake sheet with a bowl of warmed spaghetti sauce and called it dinner.

I love to read the food blogs and look at their photos. The best and most often used resources for me are actual cookbooks. Today though, I followed Goody's link to Mennonite Girls Can Cook's recipe.

I am more than happy to send you on over to their site for this great recipe.

I'm going to make another pan of these on Saturday to take to my post office. Those folks work hard and deserve a warm treat after trudging around in this bone chilling cold weather we are having.

A simple 20 minute rise time. These looked delicious even before they were baked!
Yes, the kitchen is still a mess but, I cleared the piled from the dining room table and made Cheese Stuffed Breadsticks!

Sunday, May 13, 2012

Blueberry Nut Loaf Cake

This Blueberry Nut Loaf Cake is beautiful. The top is suppose to form a crack. The orange juice brings such a beautiful color to the party. I enjoyed eating this because it wasn't much of a sweet. I know the recipe refers to it as a cake but, my description would not be one of a cake. It's not like a quick bread either. Or maybe it is. Banana bread, blueberry loaves, and other type recipes that I have tried were all by my definition a sweet. The past few months I've had a goal to eliminate most of my sugar intake. I've lost 8 pounds as a result. (and walking a mile a day) Hooray! I'm no longer in the overweight category. All of that aside. If you are looking for a not so sweet but flavorful loaf, then this will fit the ticket! This was best eaten the day of baking. There isn't much fat in this loaf so it didn't stay moist the following day. We ate almost the entire loaf the first night.
I hope my description of Fruit Loop cereal won't discourage you from making this. With that disclaimer, let me tell you this loaf tasted like Fruit Loops cereal to me.
Look at the delicious crust with it's crunchy outer crumbs


Blueberry Nut Loaf Cake
 "New Book Of Great Desserts"
Maida Heatter

1 1/4 cup of fresh blueberries
2 cups sifted all purpose flour
1/2 tsp. salt
2/3 cup sugar
1 1/2 tsp. double acting baking powder
1/2 tsp. baking soda
1 egg Large
2 tablespoons unsalted butter melted
2 oranges (you will need the zest from both oranges and enough juice squeezed from them make
            3/4 cup of orange juice
5 ounces of finely chopped walnuts
dry bread crumbs ( I used whole wheat crumbs)

Maida is swell at going into great detail with her baking instructions. For that reason I suggest you search online or scrounge the flea markets and find your copy of any of her books. I am going to write the baking instruction in my own words.


  • Wash the blueberries and allow them to dry completely.
  • Butter a loaf pan, I used a 9x5. After completely coating the pan in butter, lightly dust the inside with the bread crumbs and tap out the excess. ( this forms a delicious crust with a slight crunch on the loaf)
  • Preheat oven to 350 degrees
  • Measure the flour
  • remove one tsp. of the flour from the measuring device and sprinkle evenly over the dry blueberries and mix gently
  • Sift together all of the dry ingredients
  • In a large mixing bowl, with an electric mixer lightly beat the egg, then add the melted butter, and orange juice
  • with mixer on low speed, add the dry ingredients and mix enough just to combine
  • Stir in the nuts and zest by hand
  • Spread a thin layer of batter into your prepared loaf pan
  • Now gently fold the blueberries into the remaining batter
  • spoon the remaining batter over the thin layer in the prepared pan and smooth to level
  • I will tell you that my loaf took 55 minutes to bake 
  • Maida said it may take 70 minutes but, use the toothpick in the center of the loaf method to determine if the loaf is done.
  • Toothpick should come out clean when inserted in the center of the loaf
  • Let the cake cool on a rack for only 10 minutes, if you leave it in the pan any longer the crust runs a risk of loosing it's delightful crunch
  • gently run a knife around the edge of the pan to loosen any berries that may have juiced out and created a sticky spot
  • remove the loaf from your pan and allow to cool on the rack
orange and blueberry look beautiful together, smell delightful, and taste fruity good

If you aren't worried about calories then I think allowing a few pats of butter melt down into the crack of this loaf would be highly scrumptious


Wednesday, January 4, 2012

Kentucky Corn Meal Waffles

Lincoln Heritage Trail Cookbook by Marian French had a recipe for Kentucky Corn Meal Waffles. This sounded great to go with our White Bean Chili simmering on the stove this afternoon. Except, I threw the waffle iron away yesterday. I considered my decision of tossing it out. I also considered dragging it out of the can and giving it one more chance.

Instead, the recipe worked just fine as a corn cake, for lack of a better term.
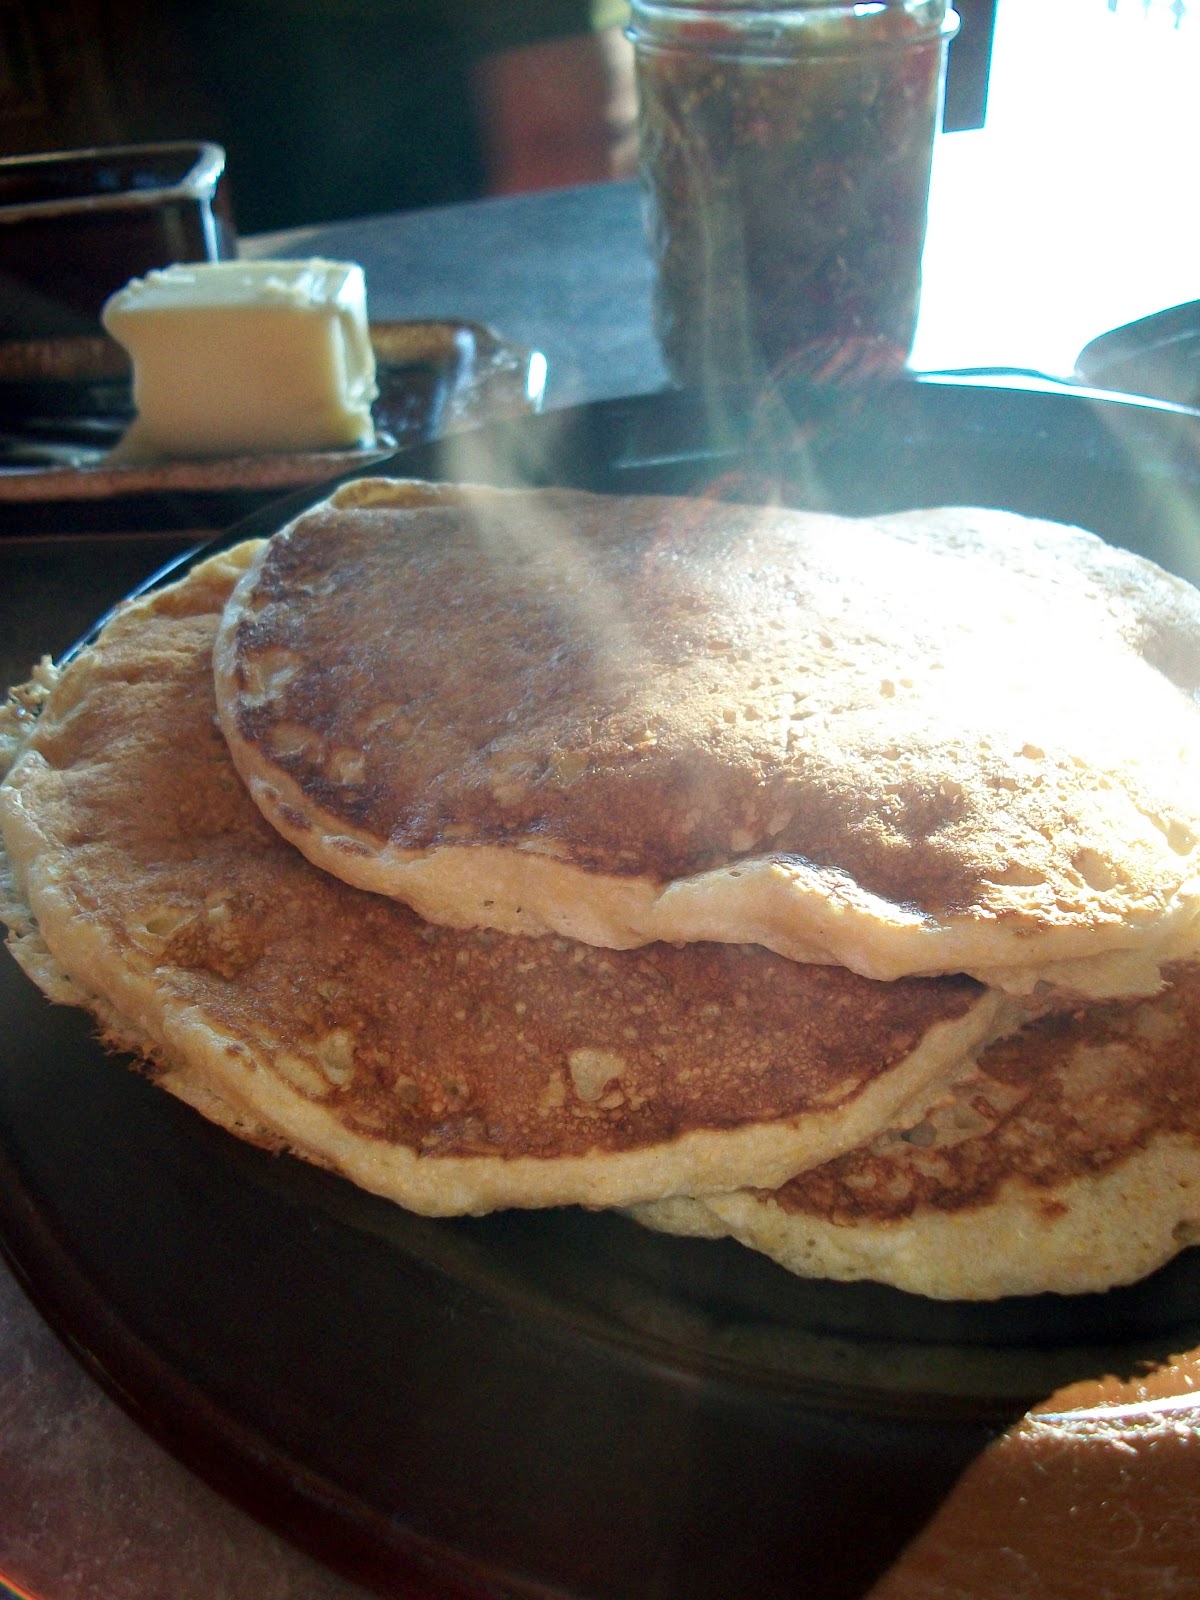
What the photo doesn't show you is how wonderful these smell during cooking. The texture is light and dreamy. I'm certain if this recipe was actually prepared in a waffle iron the result would be fantastic.
Look in the background of the picture. There's the Dixie Relish that Mister and I made last summer. This relish made good use of the cabbage and other vegetables we grew in our garden. I'm pretty sure I haven't posted that recipe yet. The relish complimented the corn meal flavor of the cakes. Just a Perfect meal on a snowy day.

Yum a perfect small bite!

Kentucky Corn Meal Waffles Cakes

1 1/2 cup yellow cornmeal
3/4 cup all purpose flour
3 tsp. baking powder
2 tbsp. sugar
1 tsp. salt
1/2 tsp baking soda
2 cups buttermilk
4 tbsp. melted butter
2 eggs (seperated)

Beat egg whites to stiff peaks. Mix cornmeal, flour, baking powder, sugar, salt, and soda. Add buttermilk, melted butter, and 2 beaten egg yolks. When well mixed, add beaten egg whites and fold in. I cooked my cakes in a non-stick fry pan which was sprayed one time before the first cake went into the pan. After that I didn't need to re-spray. Basically cook'em like pancakes.


Thursday, August 18, 2011

Raised Biscuits


This recipe for Raised Biscuits will be added to my recipe box. I found it in The Complete Book of Canning from Ortho Books. Never did I expect when I opened this soft cover magazine type book, that I would be making biscuits. It's a great guide for canning. Step by Step. The copyright is 1982 so my guess is, you could find a copy at the library or in a used book store.
Hudson Cream Flour is my all time favorite flour for making biscuits. The recipe on the back of the flour bag has been my "go to" for years. I plan to continue using that recipe for the mornings when the crew request sausage gravy and biscuits for breakfast. The Raised Biscuits take a little more time and I am not a morning person. I can easily see me serving them with a hearty stew at dinner time.

Raised Biscuits

1 package active dry yeast
1 tablespoon sugar
2 tablespoons of warm water
2 cups all-purpose flour
1 tsp. baking powder
1 tsp. salt ( I might decrease this just a smidge the next time)
2 tablespoons butter
2/3 cup buttermilk **

In a small bowl combine yeast, sugar, and water: let stand until bubbly, about 15 minutes.
In a large bowl stir together flour, baking powder, and salt.
Cut butter into the flour to make a fine crumb.
Stir in yeast mixture and buttermilk to make a moderately stiff dough
knead dough lightly for a few seconds.
pat out to 1/2 inch thickness
cut dough with a 2 inch biscuit cutter
arrange biscuits on a lightly grease bake sheet, slightly touching one another, prick tops with a fork.
Let rise in a warm place until doubled in a warm place until doubled (30-40) minutes.
Bake at 425 degrees for 10 minutes or until golden brown.
Yield 10 to 12
Bust out the butter and jelly!

** if you don't have buttermilk on hand and would like to make this recipe,
pour 1 tablespoon of vinegar or lemon juice into your one cup measuring cup, add milk to fill the cup. Let this stand for 5 minutes and you will have a nice substitute for buttermilk.
Remember this recipe only needs 2/3 of a cup of buttermilk.

Tuesday, June 14, 2011

Strawberry Bread


My plans to make Strawberry Bread today took me on an extended search. Finding a reliable recipe turned out to be harder than I thought. My stacks of cookbooks, were of no help to me today. I resorted to a google search and found this recipe. I can say this recipe is good enough.
This bread is so easy to whip up and smells like a dream while it's baking. I'm having a second slice for breakfast tomorrow. If you are wondering what to do with 1- 1/2 cups of strawberries then look no further.

Wednesday, April 20, 2011

Soy Prune Bread

Tell me, does your Soy Prune Bread look like this? The topic of  Soy Prune Bread isn't a hot conversation on the internet so, I am left to assume that mine is just right. The top of the loaf is perfectly level. Is that what Soy Prune bread is suppose to look like? I can tell you this, the taste is so incredibly complete that I may have found a new comfort food.
My Woman's Day Book of Baking copyright 1977 doesn't include a photo with the recipe.


Soy Prune Bread


1 cup of pitted dried prunes (I used cranberries also)
3/4 cup all purpose flour
1 1/2 cups whole wheat flour
3/4 cup sifted soy flour
4 1/2 teaspoons of baking powder *
1 1/4 teaspoons of salt
3/4 cup of sugar
1 egg
4 tsps. lemon juice
4 tsps. grated lemon rind
1 1/4 cups of milk
2 tablespoons of vegetable oil

Soak prunes in water to cover for 1/2 hour. Drain and cut in small pieces.
Mix together the three flours, baking powder, salt, and sugar. Beat egg in a separate large bowl. Add prunes and remaining ingredients to the egg. Add dry ingredients to the egg mixture and stir only until blended. Spoon into well greased 9x5x3 loaf pan. Let rest free from drafts for 20 minutes. Bake in 325 degree oven for 50 minutes. Cool for a few minutes in the pan on a wire rack prior to turning it out to cool completely on the rack.

My first attempt at baking this  I may have had several minor errors. After making the changes, I am really happy with the flavor. I think my loaf pan was too large and that may account for the flat top. Or maybe it's suppose to be flat.
Whatever. It tastes great. I love the lemon.
Did you know that if you run out of baking powder (like I did the first time making this bread), you can make your own. In the Home Made cookbook by Sandra Oddo I read how to do this.


* Baking Powder is made of:
 One part baking soda to Two parts Cream of Tartar.

I like the Woman's Day cookbook. Still tinkering with the Home Made book.


Tuesday, February 15, 2011

Banana Bread

This is my one and only recipe for Banana Bread. I have made this for almost 30 years. Okay, 28 to be exact. Several times a year I haul the recipe card (pretty smudged and worn) from the recipe box, and crank out a quick treat. Most likely I could  mix this up from memory and do without the card.
One thing is for sure, the smell as the bread bakes is unforgettable.


Banana Bread

1 1/2 cups flour       
1 tsp. baking soda       
1 tsp. salt

1/3 cup shortening
3/4 cup firmly packed brown sugar 

2 eggs
1 cup over ripe mashed banana's (2 or 3)

1/2 cup milk

1/2 cup walnuts (optional)


Preheat the oven to 350 degrees. Sift together flour, salt, and soda and set aside. Cream together shortening and sugar. Add bananas and eggs to the sugar mixture and mix well. Alternate flour and milk, adding to the mixture slowly. Beat well after each addition. Pour into greased loaf pan. Bake 55-65 minutes or until a toothpick inserted comes out clean, start checking at the 55 minute mark.


Monday, March 29, 2010

Oat Bran Honey Muffins

"The texture is so satisfying" so states one of my taste testers.

This is how the Oat Bran Muffin making began.
It all started with a 50% off sale.
For the cost of $1.30 I now have enough Oat Bran to make dozens of muffins. A mathematician I ain't, so you do the math. I'm thinking each muffin cost less than .10 to make. Bonus!! Plus, they taste great and are somewhat healthy! One thing is for certain, I could never find this quality of muffin for that cost anywhere.


Oat Bran Honey Muffins


1 1/2 cups oat bran
1 1/2 c. flour
1/2 tbsp. baking powder
1/4 tbsp. soda
1/2 tsp. salt
2 eggs, beaten
1 c. buttermilk
2 1/2 tbsp. canola oil
1/2 c. honey
2 tsps. ground cinnamon


Preheat oven to 400 degrees. Combine the 5 dry ingredients and mix. Mix eggs, buttermilk, oil and honey. Pour into dry ingredients and blend. Fill lightly greased muffin pans 2/3 full. Bake for 15 to 18 minutes. Makes 12 muffins.


Recently I made the German Chocolate Cake and Buttermilk Pancakes and I had just enough buttermilk left over to whip up one batch of muffins. I will make these over and over.

I added the cinnamon to the original recipe. Does this make the recipe mine because I added an ingredient? Okay, I will play fair! The original recipe came from cooks.com Also, the bake time on the original recipe was way off. My muffins took 16 minutes to bake and I yielded only 12 muffins. So essentially I made three changes. Well that settles it then...this recipe must be mine...

Tuesday, February 9, 2010

Cornbread


Hudson Cream Self-Rising flour is the bomb. I use it for my biscuits and my cornbread.

Cornbread

1 cup yellow cornmeal
1 cup Hudson Cream Self rising flour
4 Tablespoons white sugar
1/2 tsp. salt
1/4 cup vegetable oil
1 cup milk
1 egg

Mix dry ingredients together. Mix together oil, milk, and lightly beaten egg. Add the wet to the dry. Mix just to moisten.

Note***  I have always used my cast iron skillet for my cornbread. I add a dollop of shortening to the pan and set it in the oven to melt and heat the pan. Then pour in the batter this results in a wonderful deep golden crust. You use caution though, Hot pan, hot oil and all.

Spray pan with non-stick spray and bake cornbread in a preheated 425 degree oven for 20 minutes. Feel free to add cheddar cheese, green onions or just about any herb of your choice. I went with the plain jane version tonight.