Pages

Showing posts with label Side Dish. Show all posts

Thursday, October 23, 2014

Fried Apples

Sometimes we over think our food. Fried apples are perfect in their simplicity. This two ingredient  side dish also doubles for breakfast.

Start with good apples. Not the shriveled up ones in the bottom drawer of your refrigerator.
Well... would you look at that? What is going on at that orchard? Hmm an interesting specimen. Your apples don't need to have such a charming face but, fresh crisp apples will do fine.

Butter.
You can't get there from here if you don't use real butter.
 The apples will fry in margarine or non stick pan spray. It's a sin though. Use butter.

Nooo, not the whole stick. Just a pat. I used about a tablespoon and a half to fry three fat apples tonight.


Swirl and swirl until the butter develops a slightly brown color. I mean slightly brown!
With your heat on medium, add the freshly peeled and sliced (to your liking) apples to the pan.
Tonight, I went all fancy schmancy and cored the apples and sliced into rounds about 1/4" thick. You can slice, dice, or cube the apples. Nice thick pieces, otherwise the apple will become squishy and lose their texture. As you can see, a few of mine were a little too thin and limp. Flavor was still outstanding.
Turn the apples over, stay with them until the color develops. We aren't going for perfection here. Remember...don't over think it. It's just fried apples.

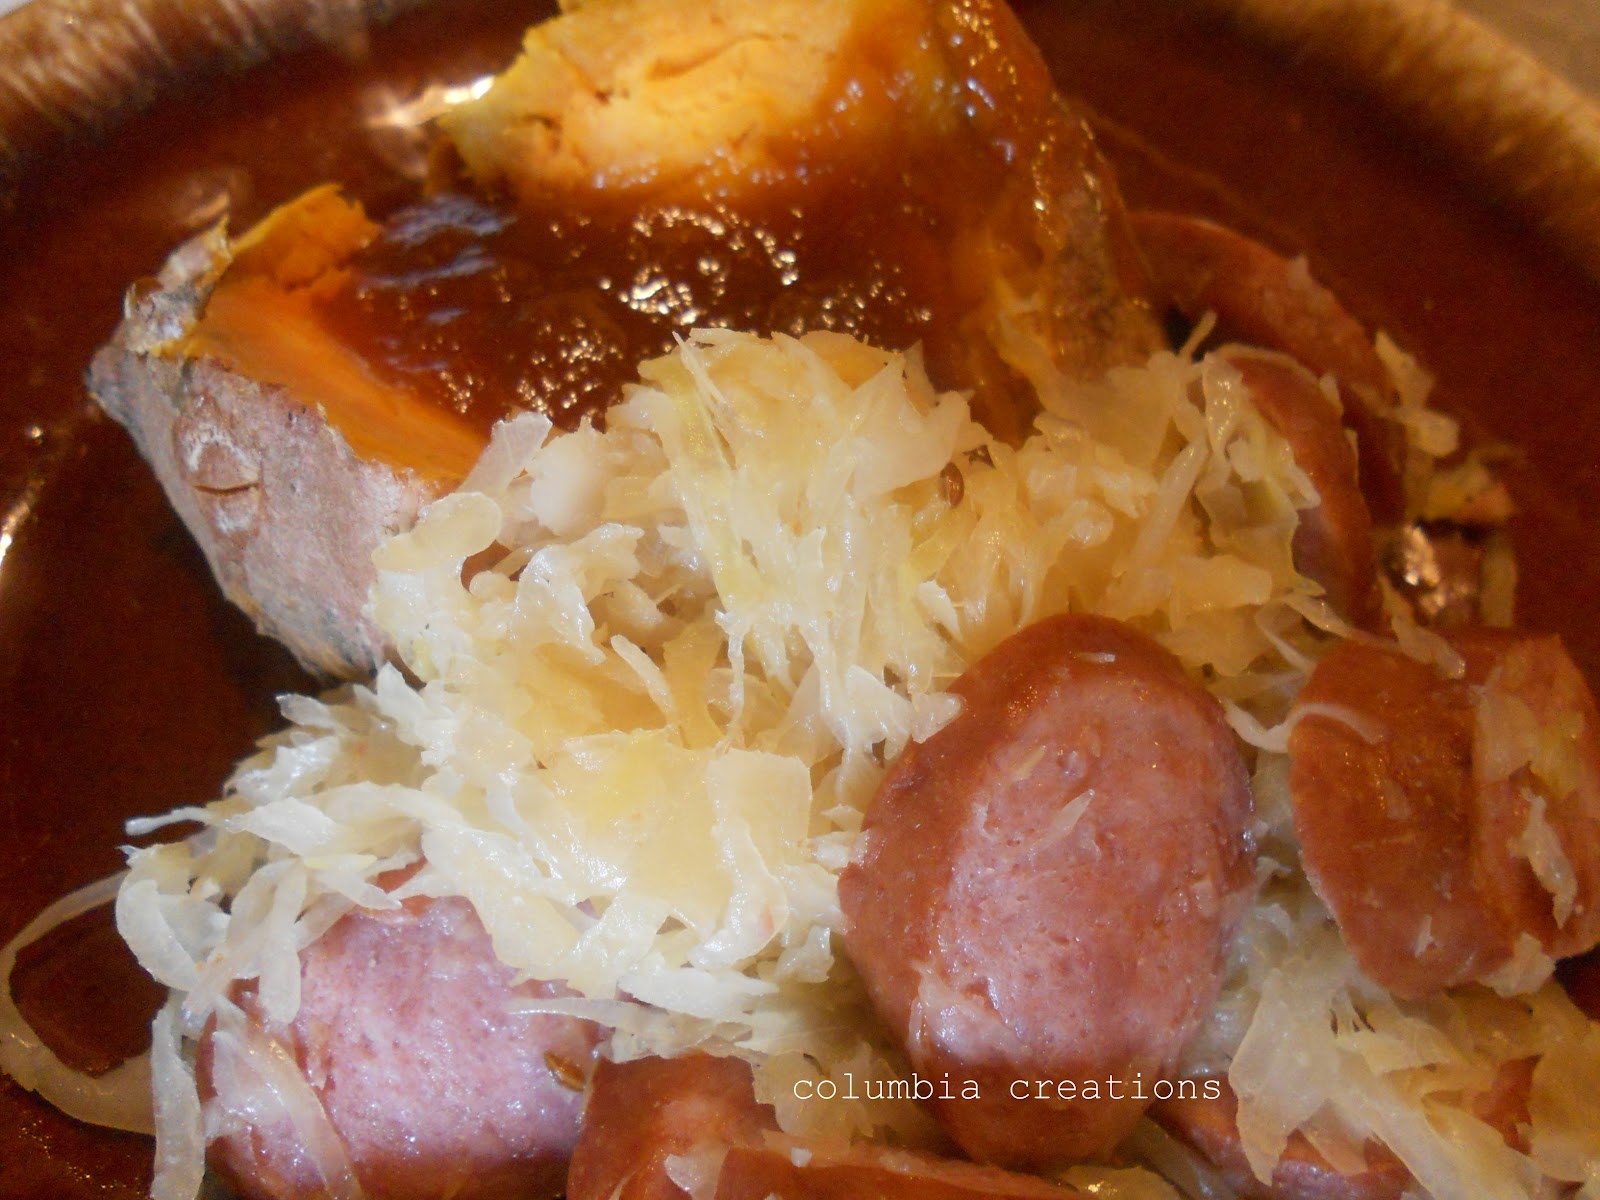
Pork chops stuffed with blue cheese just cry out to have fried apples on the plate beside them.

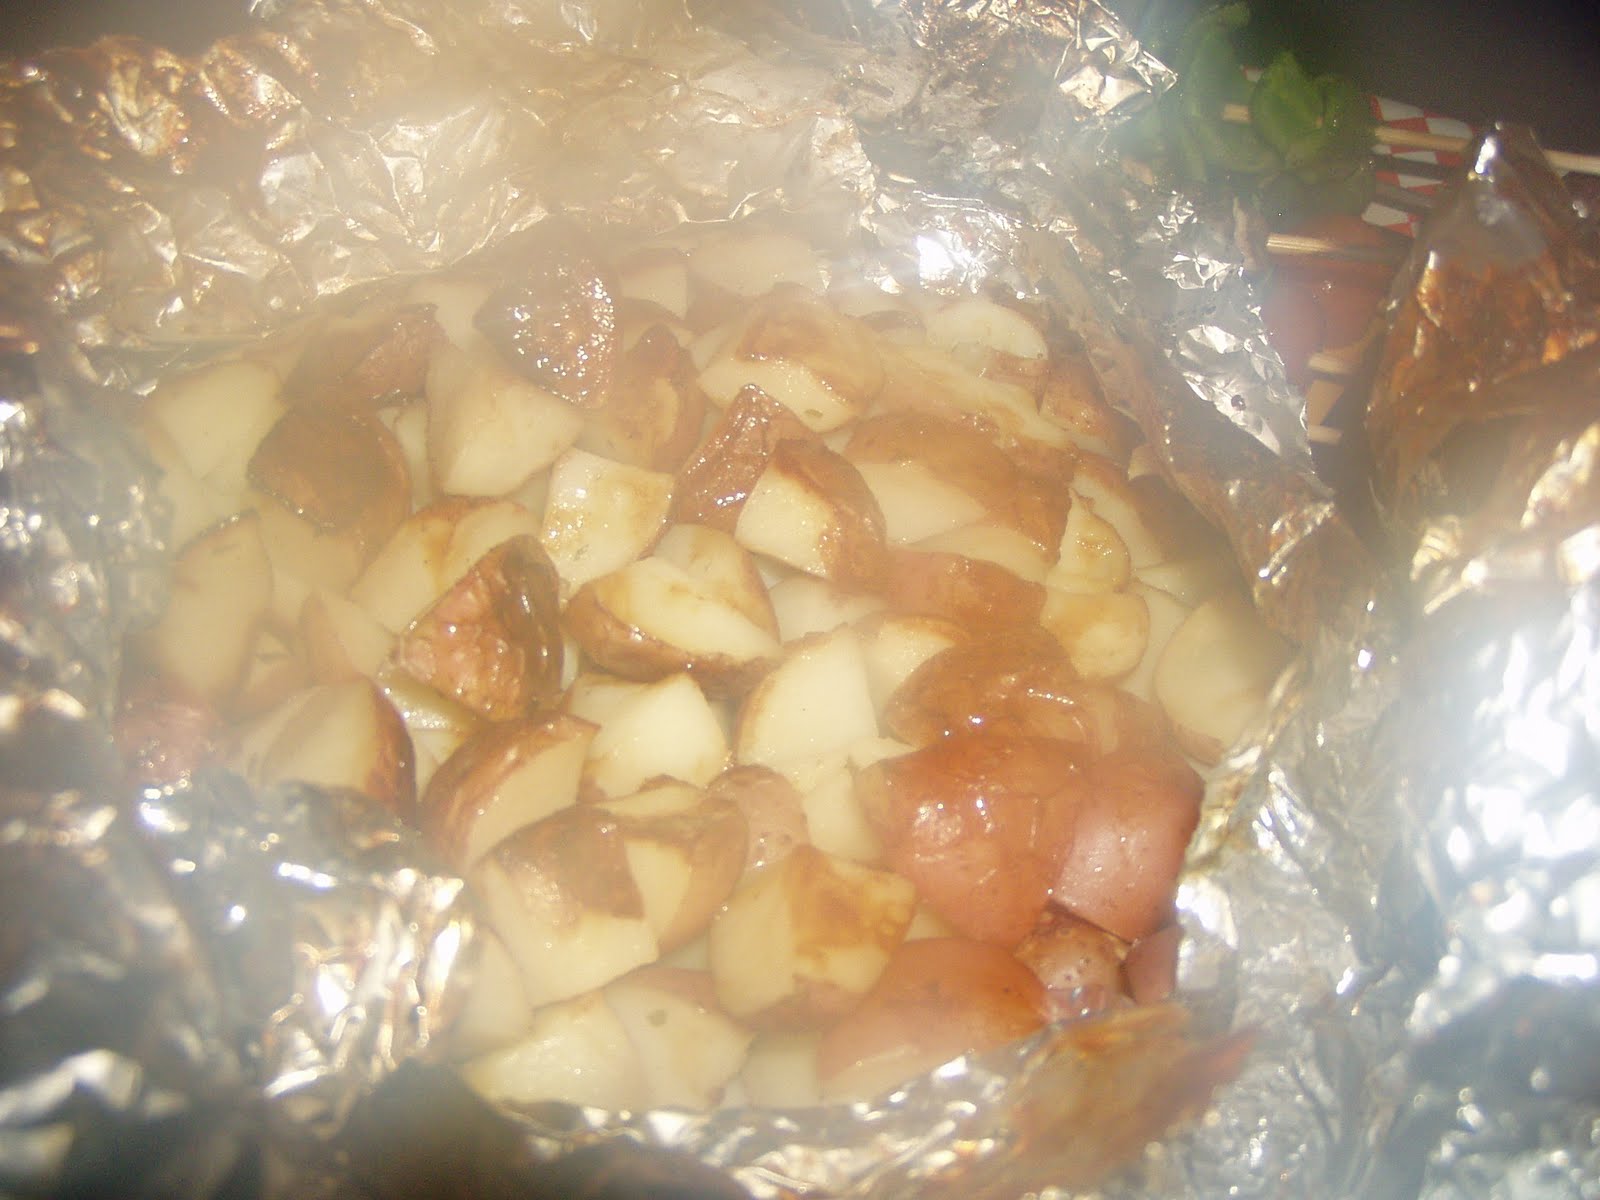
We enjoyed fried apples, baked beans, smoked sausage and biscuits for our dinner. Oh, and cottage cheese. From the dairy in the country. It's Ohio we love our dairy!

Leftover apples and a biscuit will be perfect with my morning coffee! It's cold here now. Morning coffee takes on a whole new life. It's dark and cold in the morning. Time to start crocheting something warm.


Sunday, February 24, 2013

Brussels Sprouts and Joy of Cooking

Joy of Cooking is the most complete cookbook in my library. If you don't own a copy of this book, go buy one. I like the recipes and the information provided for food items. There's also lots of good instructions for everything from baking to selecting cuts of meat. Every recipe I've tried has been a success. Today, I searched under "B" to find a good way to prepare brussels sprouts. I found information and an easy recipe.

Mister and the kid do not like brussels sprouts. The oldest daughter came over for dinner tonight so she helped me polish off the bowl of buttery, nutty goodies. The recipe serves 4-6 supposedly. I don't think so, it was a generous serving for two in our house.

Brussels Sprouts with Browned Butter and Toasted Almonds.

Steam until tender 1 lb. of brussels sprouts (15 minutes)
Meanwhile, in a skillet toast 1/2 cup of almonds (or whatever nuts you have on hand)
Remove the toasted almonds and set aside.
Place 3 tablespoons of butter into the skillet and brown until golden and delicious.
Drain the Brussels sprouts completely in a colander and add to the skillet with the butter and almonds.
Season well with plenty of salt and pepper to taste!

See, I told you it was easy.

I would plant Brussels sprouts and grow them in our home garden except I'm the only one who would benefit from the planting.

Eat 'em up ole boy!


Tuesday, February 12, 2013

Creamed Potatoes and Abraham Lincoln

Happy Birthday Abraham Lincoln. In honor of the day, we had creamed potatoes for dinner. According to a small cookbook on my shelf, President Lincoln enjoyed this side dish.
It's pretty simple fare. The key to making good creamed potatoes is to cook the potatoes in a small amount of water. This makes a nice starchy outside in which the creamed part sticks really well.

Creamed Potatoes

2 cups of diced yukon gold potatoes
salt and pepper to taste
1 cup milk
1 1/2 tablespoons butter (not margarine)
1 1/2 tablespoons all-purpose flour

Peel and dice the potatoes. Add potatoes to a 2 qt. cookpot, add just enough salted water to barely cover the potatoes and cook until fork tender. Don't overcook them. You want the potatoes to hold their shape. Drain the potatoes well in a colander.
While the potatoes are draining, use the same cookpot to brown the 1 1/2 tablespoons of butter. Stir the flour into the browned butter, add the milk and cook until thickened. Season generously with salt and pepper. Add the well drained potatoes to the creamed mixture (basically it's a gravy).

There you have it, a nice rustic side dish. I imagine this to have been served along with venison. We had Parmesan Chicken with our creamed potatoes.

Honest Abe's place is the next Presidential visit I hope to make.

Thursday, October 18, 2012

Macaroni and Cheese Pudding

The Cleveland Press Olde Time Recipes cookbook rears its head once again. I've placed many blue scraps of paper between the pages marking recipes I still want to try. Of all of my cookbooks old and new, The Cleveland Press Old Time Recipes by Barbara Bratel is my favorite. I love the Joe Frogger recipe, the Ohio Lemon Pie, and I'm equally pleased with this recipe for Macaroni and Cheese Pudding.

I used bow tie pasta, that's what was on the shelf. Also, I used a great variety of cheese hunks that were just "lion" (Scar) around from a party this past weekend. We are eating the ever popular, grass fed, ground chuck patties, served on a plate sans bun, along side the macaroni dish. Yes, complete with a juicy chunk of tomato.


Macaroni and Cheese Pudding
a nice casserole, not runny and gooey, solid and sturdy

2 1/2 cups elbow macaroni
1/4 cup butter
1/4 cup all purpose flour
2 1/4 cups whole milk
3 eggs beaten together
1 tsp. salt ( I used less, some of my cheeses were on the salty side)
Pepper to taste
2 cups sharp cheddar cheese or half New York State and half cheddar
1/2 cup dry bread crumbs ( I used whole wheat bread crumbs, I like the flavor better)

Cook macaroni according to package directions and drain well. Preheat oven to 400 degrees. While macaroni is cooking, melt butter in large sauce pan. Add flour and stir until smooth and cook a few minutes.

Add the milk a little at a time and cook until bubbly. Quickly stir in beaten eggs, so as not to make scrambled eggs (or temper them). Stir in salt and pepper.

Arrange alternate layers of cheese (reserving some of the cheese for the top)  and pasta into a well buttered 9x13 casserole dish. Pour hot milk mixture over the top of the cheese and pasta. Dot with butter, sprinkle with cheese, top with bread crumbs. Bake for 30-40 minutes, or until golden and bubbly.

Thursday, July 26, 2012

Peach Reduction

Do not add sugar to this peach reduction or you will end up with a product that I believe is too sweet to use as a savory drizzle. Actually sugar would make more of a jelly consistency and that's not what we are going for here. The peaches have natural sweetness. Without added sugar the end result will be a slightly tart, sticky, sweet glaze that is perfect. I'm considering trying this with cheesecake. A sweet cheesecake recipe would be greatly enhanced with the tangy flavor of this peach reduction topping.


Here's the recipe.

Peach Reduction 

20 or so very ripe peaches
large cook pot
watchful eye


Peel peaches and remove the pit from about 20 really ripe peaches

Place the peaches in large cook pot and smash them up to release some of the juices, cook this over

medium to low heat.

Bring the peaches to a boil.

Reduce the heat to low, and stir and watch, then stir and watch some more.

Once the peaches have become a thick deep golden color, take them off the heat to cool.

Place cooled peach reduction in the refrigerator.

Drizzle at will.

I found this especially scrumptious over baked sweet potatoes.
What a flavor explosion. Microwaving the sweet potato until soft is this quickest coolest way to make them, especially when it's about a billion degrees and the humidity makes you want to stick your head in the freezer.

Uncomplicated, powerful ingredients rock my world.

I added a sprinkling of salt just to balance all of the flavors.

Next time, I want to try this peach reduction topping on some grilled asparagus and grilled chicken.


If you make it, let me know what you spooned it over. Hey, a hot buttered biscuit would be good too.

No butter needed with the sweet potato. The peach reduction  was simply just enough.


Sunday, November 27, 2011

Sweet Potato Casserole

This is a recipe I'm posting primarily for my daughters. This blog is to serve as a universal recipe box for them. Libby loves sweet potato casserole. She is my oldest daughter and shares my love for sweet potatoes. Of course, you know I am going to encourage you to grow your own. They are extremely easy to grow and keep for a very long time. Please do not ever confuse this dish with that crappy version that can be found in the cardboard box aisle of your grocery store. Try this recipe with it's deep fresh flavor and I hope it will become a favorite for you too.


A single serving of the casserole

Sweet Potato Casserole

Topping Ingredients

3 tablespoons of softened butter
1 cup brown sugar
1 cup chopped pecans
1 cup flaked coconut
1/3 cup all purpose flour

Base ingredients

3 large sweet potatoes
1/2 cup white sugar
2 eggs
1/4 cup milk
1 tablespoon of orange zest
3 tablespoon butter
1 teaspoon vanilla
1/2 teaspoon salt

Preheat oven to 350 degrees. Wash potatoes and poke holes in them. Roast them on a sheet pan until fork tender. Allow to cool, while you mix up the topping. For the topping, mix together dry and then cut in the butter until crumbly.
When the potatoes are cool enough to handle, remove the skins and mash the potatoes ( I use a hand masher).  You should have 3 1/2 cups of potatoes give or take. Stir in white sugar, eggs, milk, zest, butter, vanilla, and salt. Spoon casserole into a greased 7x11 glass pan.
Cover with topping and bake uncovered for 35-40 minutes or until golden crunchy and bubbly.

This recipe is used on holidays. My favorite way of eating a sweet potato is baked, served with butter and a sprinkle of cinnamon.


Tuesday, August 16, 2011

Sauteed Broccoli with Garlic and Red Pepper


Remove the florets, then peel and dice the stems of:
2 pounds broccoli
Steam or boil until barely tender, then drain. If not finishing the dish until later, cool the broccoli under cold running water. Heat in a large skillet
3 tablespoons extra-virgin olive oil.
Add and cook, stirring over medium heat until their aromas are released;
2 cloves garlic, thinly sliced or chopped
2 good pinches of red pepper flakes or 1 small dried chili pepper crumbled
Add the broccoli and cook until heated through and tender, 3 to 4 minutes longer.Season with;
Salt and ground pepper to taste

Scalloped Potatoes


4 cups of Yukon Gold Potatoes sliced thin
5 oz. American Cheese
5 oz. Colby Cheese
1/2 stick of butter cold (1/4 cup) and cut into tiny pieces
1 pint half and half
salt and pepper to taste
1 cup diced onion

Preheat oven to 450 degrees. Butter a casserole dish. Layer potatoes,onion and cheese. Dot each layer with butter and season with salt and pepper. Repeat layers. Pour half and half over entire dish and bake covered for 45 minutes, removing the lid for the last 20 minutes.


This recipe ran in a local newspaper about 30 years ago. Credit should be given to Mrs. Chapman of Litchfield, Ohio.

Friday, July 29, 2011

Grits

Grits might not be an unusual food item to you. I grew up in a southern family and we never ate grits as a kid. I know grits are suppose to be served on every southerners table, but not ours. I had never eaten or cooked grits before this week. I never really noticed them in the stores either.
I found a bag of grits for .99  and decided, why not.

I'm not sure if it was Mel's Diner influence and hearing the nasally Flo bark back "Kiss my grits" to the greasy spoon cook or just random internet searches. Somehow, my mind settled on making Paula Deen's Baked Garlic Cheese Grits.


I will be making grits again but, not using that recipe though. The grits were good, really good. Writing a recipe and specifying 16 ounces of cheese rather than coming right out and saying 1 whole pound of cheese is clever editing. The grits would probably be just as good if half the cheese and butter were used. That's sort of Paula Deen's style, I think.


Have a slow Saturday and enjoy your weekend!

Wednesday, March 30, 2011

Pick Pockets


In 2009 I pickled cucumbers. Yes, homemade pickles. Homemade isn't cheaper than store bought. Just tastier, and I know exactly what is in them. Check out the post from August 2009 to learn how to make your own pickles too.

This cookbook has sat around for a year. I never really read it. I almost slipped it into the going to the Goodwill pile. Instead, I used this recipe to make Pick Pockets today. The book will stick around for a little while longer. There are some off the wall concoctions in it.
Just to be safe... I only made 1/4 of the recipe. My skepticism insisted that I not waste the last precious jar of homemade pickles on something that might suck. The Pick Pockets didn't suck. The recipe instructs to wrap the pickles in the dough. I actually molded the dough around the pickle as if working with clay.
Next time, I plan to use the dough but, skip the pickle part and insert cauliflower. I love deep fried cauliflower. This looks like a healthy baked option for vegetables.
Interesting enough.

Saturday, March 26, 2011

Spetzla

In 1817 about 300 Germans came to America and started a commune. The English Quakers helped finance their travels and the purchase of 5000 acres of land in Ohio. This land became known as Zoar. From Field To Table by Hilda Dischinger Morhart is a collection of original Zoar recipes. This is a small 52 page paperback that is spiral bound.

I chose to make the Spetzla from this book.

Spetzla

2 cups flour
1 egg
1 tsp. salt
water

Mix flour, egg and salt with enough cold water to make a very stiff batter. Beat until very smooth. Drop by teaspoonsfuls into boiling water and boil until they come to the top, about two minutes. Drain well.

The Spetzla can be added to soups.

My approach was to brown 1/2 stick of real butter in a skillet to a golden perfection and drizzle over the well drained Spetzla. Pretty good.

Here is the most interesting part of it all.

The Zoarites women had laundry days on Monday. Spatzlies were made for the afternoon meal on Monday. The water in which the Spetzla was cooked would be saved and then used to starch the clothing before hanging it out to dry.

This communal people paid off their debt of $15,000 to the Quaker community, by earning money digging the 7 miles of the Ohio Erie Canal that ran through their land.

Until 1898 this group survived with agriculture being their main task.

I enjoyed this cookbook for the educational side of it. The Zoar community didn't share my view on many facets of life. They loved to garden and cook. The group shared these two things in common with me. I don't think I would have faired well in the commune religious lifestyle.

Sunday, August 15, 2010

Campfire Grub

One day this week, I will make a genuine effort to snap some photos of the garden and cook something fabulous, I promise...my family could use a good healthy meal. The humble little world of Columbia Creations has seen lots of traveling this Summer 2010. Every week I have high hopes of posting recent garden growth photos. The weekend rolls around, and off we go on some new excursion, leaving the blog world behind.

This is a sample of our menu while camping a few weeks ago.

Steamy hot... right off the fire.


Campfire Potatoes

3lbs. of new red potatoes ( dug a few days earlier)
Olive Oil
Dry Hidden Valley Ranch Dressing
Foil
Gallon Size Zipper Baggie

This is just a perfect camping recipe. I transport all of the ingredients in the baggie. Directions are impossible to mess up.

Just minutes before cooking once your fire has sufficient hot coals;
Wash and chop the potatoes
place them in the zipper bag
 drizzle olive oil over potatoes
sprinkle generously with dry ranch dressing
pour the contents of the bag into foil, wrap well in several layers of foil
place indirectly over the fire
 flip occassionally
 test for doneness by poking the potatoes with a fork, when the potatoes are soft they are done!
Caution...Steam is hot!
Not gourmet...just yummy at night time around the campfire.

Shish Kabob

Let's face it ,who hasn't been served Shish Kabob and the meat is over-cooked in an attempt to get the peppers soft, or the meat is cooked perfectly and the vegies are just nasty underdone flavorless hunks.
I solved this problem by making one entire skewer for each individual component of the dish. Once again, this dish is great for camping.
 Each one of the proteins can be placed into marinade before you leave your kitchen. Toss into a baggie and store in the cooler.
The peppers and onions are from my garden, the mushrooms are not...although next year I am hoping to convince Mister that we should grow our own. I found a mushroom growing kit in a catalog. It's cheaper to buy mushrooms from the grocery. My thoughts are... that it might be cool to grow them myself ( I don't really even like them), I just cook them for others. Okay now I'm rambling again!! Back to this Shish Kabob.

It's all very easy to do. Soak the skewers, lace the skewers with items, cook and eat!!


We chowed!!

Life is slightly slower, can there be redemption for stripping myself of all reason and taking on too much? Baby steps.

Tuesday, July 20, 2010

Cabbage recipe


This recipe will make the collection. It was found in my new favorite reading of Amy Vanderbilt's Complete Cookbook. I'm always on the search for new unique side dishes and this recipe sounded good. My treasure of a cookbook was purchased for $1.00 at a local flea market. As I read through the whole book I wrote down page numbers of dishes I want to make. Ya never know...a recipe might sound good on paper but taste nasty. Scalloped Cabbage is a keeper.

Here is the recipe as it appeared, with my variations highlighted.

4 cups of shredded cabbage ( I cut mine into strips 1"x2")
1/3 cup canned tomatoes ( I used Rotel with green chiles )
1 cup of medium white sauce (from same book recipe follows)
1/2 cup shredded cheddar cheese
1/2 cup bread crumbs ( I used Panko crumbs)

Cook the cabbage in just enough salted boiling water to cover, cooking until tender. Drain. Place into a well buttered 1 1/2 quart casserole dish. Mix the white sauce and tomatoes with the cabbage. Sprinkle generously with bread crumbs and cheddar cheese, mixing some down in with the cabbage. I basically just layered everything. Bake at 350 degrees for 25 minutes or until top is bubbly and golden brown. My bake time was longer... around 35 minutes.

Medium White Sauce

2 tablespoons butter
2 tablespoons all purpose flour
1/2 teaspoon salt
1/8 teaspoon black pepper
1 cup milk

Melt butter in saucepan. Stir in flour and seasonings until smooth. Add milk slowly. Cook and stir continually over medium heat until desired thickness.

I have to admit, when I think of cooked cabbage, the horror smell of overcooked stinky cabbage comes to mind. This is not that kind of dish. It's mellow well balance of flavors only offers a clean fresh flavor of the vegetable. Hey, cabbage is cheap. How could you go wrong for at least giving it a try?

Of course, my cabbage was free...right out of the garden baby! Look at this bad boy.. delicious!

Monday, May 3, 2010

Chayote

I couldn't resist buying this curious looking vegetable. 

With a cost of only 68 cents, the chayote, beckoned me to at least try it once. It's a bit odd looking.The seed is weird too. Well, weird is in the eye of the beholder.
I did a small amount of reading about the chayote prior to tackling it head on.
I chose to peel. I removed the seed.
I read conflicting opinions on the necessity of either action. I played it safe.
Peeling the chayote exposed me to a waxy, soapy, and almost slippery feel to the flesh of the vegetable itself. Eaten raw, the only taste I found this to be similar to would be an english walnut. I expected a squash taste. From the little that I read, it was suggested to prepare it as you would any squash.
I tossed the chopped chayote into a dry skillet ( I love using an electric skillet). It seemed natural to throw in a chopped sweet potato. What the heck....I peeled and chopped one apple and added to the pan. After a slight browning on everything I decided to add a little extra virgin olive oil. I might skip on that next time. This was a fly by the seat of my pants and taste as I went dish. And salt of course...
I like smoked sausage with most squash dishes so it seemed only natural to cube
 8 ounces of this skinless meat into the whole concoction.
When the veggies and apple were tender I started scrounging the cupboard for more flavor.
Now time for a little seasoning!
I have a fresh sage plant out on the deck.

Chopped Sage
Coriander
Red Pepper Seeds
Red Wine Vinegar
The chayote is very bland. The salt complimented the sweet potato well. The apple was a nice little subtle sweetness to the dish.
I deglazed the pan with a small amount of red wine vinegar. Tossed in a generous sprinkling of red pepper seeds, sprinkled with coriander and last but not least the fresh sage.

All in all I liked it!!
It was worth the .68 just to peel this martian looking thing and then dissect it and experiment with something totally new.
This was my dinner.
I think it's pretty much a Hash.
Chayote Sorta Hash


Buttered sliced french bread browned in the same skillet I cooked the Sorta Hash in.

The chayote is not a super star but a nice supporting actor in the show.

Tuesday, February 23, 2010

Puffed Cauliflower Cheese

Do you like Cauliflower?

This recipe raised my love of cauliflower to a whole new level. Sure, we have all served a big bowl of ranch dip with raw cauliflower at one function or another. For years I only used cauliflower in soups and as part of a veggie tray. Play with this recipe, maybe you will discover as I have, a new favorite way to eat and serve cauliflower.

The statistics according to the USDA were shocking for me to read. Americans only consume 2.1 lbs. of cauliflower per person each year.

I will eat them in a house
I will them with a mouse.

Oh wait, that book isn't about cauliflower.

Try them, try them and you may!
Puffed Cauliflower

1 medium head cauliflower, broken into small florets
1/4 cup butter
2 tsps. all-purpose flour
1 cup milk
salt and pepper to taste
1/4 cup fine dry bread crumbs (divided)
3 egg yolks
3 egg whites
1/2 cup monty jack cheese cubed
1/2 cup pepper jack cheese cubed
(you can play with the cheese type/types)


1. Preheat oven to 400 degrees. Cook the cauliflower until tender. (your choice of cooking vessels, stove top, steamer, microwave or whatever) Drain the cooked cauliflower well.

2.Melt the butter in a small pan. Stir in the flour, and cook over low heat for about 2 minutes. Gradually stir in the milk and bring to a boil. Watch this closely, stir it. Season with salt and pepper.
(recipe continued after a short note)

Short note***Now for the bread crumbs. Resist temptation to use more than the recipe calls for. I've done it. Trust me this is not the ingredient to use without measuring.

3.Remove milk from the heat and stir in 1/8 cup of the bread crumbs into the milk mixture. Stir in the egg yolks, cheese, and cauliflower.
*temper the yolks of course*

4. Whip the egg whites in a large glass or metal bowl until stiff. Fold the cauliflower mixture into the egg whites. Transfer to a ceramic or glass 2 quart casserole dish. Sprinkle with remaining 1/8 cup bread crumbs.

5. Bake for 30 minutes in the preheated oven or until puffed and golden.

Switch up the cheeses. Sometimes I use sharp cheddar. Depends upon what I am serving the casserole with.

*temper the egg yolks* you know what I mean don't you?

Temper the egg yolks before adding to the hot by stirring a bit of the hot into them first. Then add the warmed egg yolks to the sauce and continue cooking.

Tuesday, February 9, 2010

Barley

Like most kids in my generation I grew up eating canned soup and grilled cheese sandwiches. Vegetable Beef was my favorite. Barley swam along side of the vegetables in my bowl. I always wondered what kind of vegetable that little thing with the brown spot was. In my child like mind I convinced myself that they were just tiny little potatoes.
Instant Barley is almost as simple to prepare as dumping soup from a can.

So take a look at my grown up version of vegetables and barley.

My Winter Barley with Peas

1 1/3 cup beef broth
2/3 cups quick cooking barley
1 garlic clove minced
1/2 cup thinly sliced onions
1/3 cup chopped mushrooms
1/2 cup diced celery
1 cup frozen peas
2 tablespoons Soy Sauce
1 tablespoon olive oil


Bring broth to boil, add barley and cook for 10-12 minutes or until tender. Meanwhile in a small fry pan heat olive oil and add celery, onions, garlic and mushroom. Saute vegetables until tender then add frozen peas and soy sauce. Add this to the cooked barley and combine.

I served this Barley with Peas dish alongside a gorgeous hunk of cornbread and a nice slow braised chunk of beef.
Never mind that little glaze of fat on the beef....it was yummy!


Wednesday, November 25, 2009

Thanksgiving Bread Stuffing

Before boxed stuffing was mass produced and served at holiday tables, a  life of homemade delicious stuffing existed.
In 1961 a cookbook was published by the Wear-Ever Aluminum, Inc. My mom used various recipes from this cookbook that I still prepare today. Bread Stuffing on page 101 has become the flavor associated with Thanksgiving in my family for many years.
Nothing fancy about each individual ingredient but the combination of them together tastes like the holidays to me.

Bread Stuffing

1/2 cup butter
1/4 cup minced onion
1/4 cup diced celery
16 slices of bread
3/4 tsp. salt
1/2 tsp. poultry seasoning
1 tablespoon minced parsley
1/8 tsp. pepper

1 Melt butter in large fry pan; add onion, celery: saute until tender.
2. Cut crusts from bread; toast bread.
3. Dip bread into milk,then squeeze out; crumble into butter mixture.
4. Add salt, poultry seasoning, parsley, pepper;stir until mixed
5. Cook over low heat 3 minutes stirring frequently; cool.
Sufficient stuffing for a 4 pound fowl.

A few changes to this recipe have evolved over the years. I do not cut off the crust. We like the chewiness that is added by leaving the crust on. In addition, I increase the poultry seasoning to taste, adding up to as much as 1 1/2 tsps. Of course, I never just prepare a 4 lb. fowl so the recipes is doubled or tripled most of the time!

I have no photos at this time to share with you. If the whim of diligent discipline should happen to sweep over me I will try to photograph on Thanksgiving. If not, you will just have to trust me on this!

If you are lucky enough to find a copy of this cookbook I think you will find the pages as entertaining as I have. The meat guidelines were very helpful to me as a young cook. My mom passed her cookbook down to me and it still has her little notes and inspirations written randomly throughout.

Saturday, September 5, 2009

Homemade Noodles with Brown Butter

Homemade American-Style Noodles

3 egg yolks
1 whole egg
1 Tablespoon Salt
2 cups all-purpose flour
3 Tablespoons cold water

Beat the egg yolks and egg until they are light. Beat in the salt and 3 T. of cold water. Using your hands work the flour into this mixture to make a stiff dough. Cut into three equal parts. Cover with plastic wrap and let it rest for a few minutes. Dust a board of pastry clothes with flour and roll out one part of the dough as thin as possible. Cover with a dishcloth and let the dough rest for 10 minutes.Repeat with the other two pieces.

Sprinkle one sheet of dough very lightly with flour and roll up like a jelly roll. With a sharp knife, cut across the roll into 1/8 inch wide strips for fine noodels and 1/2 inch wide strips for broad noodles. Open out the strips and hang over a broomstick or chair back to dry. They will be ready to cook when they have lost their surface dampness. About 10 minutes should be enough.

Bring a large pot of salted water to a rolling boil and drop the noodles in. Boil vigorously until just tender- between 5 and ten minutes. depending on how thin you have succeeded in rolling them; fork out one and taste to determine doneness. This recipe makes about 1 pound noodles or enough to serve four. Noodles freeze well when placed uncooked in a plastic bag or container.

*** This noodle recipe is from an old cookbook of mine that I purchased at a Craft Show about a hundred years ago! Come Into My Kitchen/Favorite Recipes gathered by the Troyer's.

The only change I make when I use this recipe is the cutting/drying technique of the noodles. I do not jelly roll them. I just cut strips with a pizza cutter. I also do not hang them to dry. I just allow them to loosley lie on the counter to dry.

Browned Butter for the Noodles

I toss my noodles in Browned Butter before serving them! I recently learned this while eating in the kitchen of an Amish family. YES... I was actually lucky enough to sit in the home of a local Amish family kitchen and have dinner.

Browned Butter

Place half stick of (real) butter in a skillet with the heat on medium high. WATCH Closely and swirl the pan frequently until the bits of brown begins to form in the butter and it smells nutty!
Toss the noodles in this simple flavor extravaganza. I could not believe how great this simple technique makes noodles or mashed potatoes taste! Margarine will not work.


Friday, April 24, 2009

Orzo

Love this recipe! I don't use the food processor though, I just finely chop everything. I think it looks nicer. Use freshly grated cheese, not the dry powdered stuff in a can.

Sun-Dried Tomato Basil Orzo

2 cups uncooked orzo pasta
1/2 cup chopped fresh basil leaves
1/3 cup chopped oil-packed sun-dried tomatoes
2 tablespoons olive oil
3/4 cup grated Parmesan cheese
1/2 teaspoon salt
1/2 teaspoon ground black pepper

DIRECTIONS
Bring a large pot of lightly salted water to a boil. Add orzo and cook for 8 to 10 minutes or until al dente. Drain and set aside.
Place basil leaves and sun-dried tomatoes in a food processor. Pulse 4 or 5 times until blended.
In a large bowl, toss together the orzo, basil-tomato mixture, olive oil, Parmesan cheese, salt and pepper. Serve warm or chilled.